
When I became a Mummy, I decided (against my better judgement) that I should make all of my Bean’s birthday cakes until they asked me not to. Now, I love baking and have done so since I was a teenager, and I enjoy baking with the Beans, but decorating cakes really isn’t my forte. I don’t have the natural gift of the many beautiful creations I see online, BUT I have a go, and I do what I can.

Jelly Bean’s Birthday
This year, as Jelly Bean’s birthday approached at a rate of knots, I suddenly realised that I hadn’t even considered his birthday cake and what I might make him. The Beans all love chocolate, so I decided that would be a good place to start. I looked through my cake decorating books for inspiration, and I thought back to all the cakes my Mum had made for me when I was little. I decided there and then that I would make him a hedgehog birthday cake. It had nothing to do with the jungle-themed party decorations he had chosen himself, but he’s two, so he wouldn’t really care anyway.
Baking a dome-shaped cake
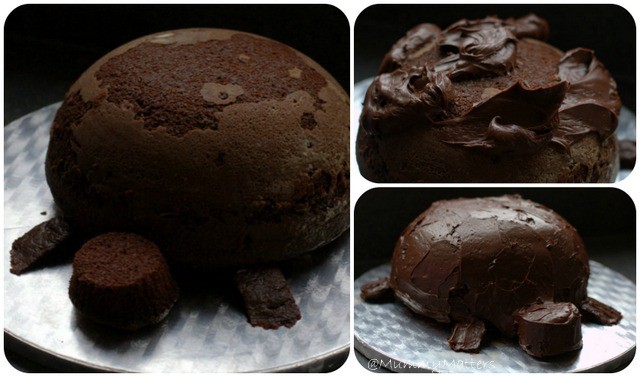
I spoke with a friend of mine who bakes lots of lovely cakes and asked for her tips on making a domed cake using a Pyrex bowl, she advised me to wrap the Pyrex bowl in a cold, wet kitchen towel and then wrap it in the kitchen foil. This helps to keep the outside of the bowl cool to give the inside of the cake time to bake without scorching the outside – what a brilliant tip it turned out to be!
Fingers crossed
I used a standard chocolate cake recipe, and then I greased the bowl well and covered it with flour to stop the mixture from sticking to the sides of the bowl. Since this was my first time making a cake in a Pyrex bowl, I had to play it by ear with the baking times. I knew I needed to bake it slowly to give the inside a chance to cook, so I set the temperature to 160C (fan-assisted) and kept checking the cake every 15 minutes with a skewer. Unbelievably, the cake took 90 minutes to bake, BUT it baked perfectly from the inside out. It was moist all the way through, with no scorched or dried-out bits in sight!
Don’t forget the head
As well as the large cake, I also bought two small cupcakes. One for the head of the hedgehog birthday cake and one for testing purposes (or because I had too much mixture leftover).
Or the feet
Before turning the dome over, I needed to level the top of the cake to give it a flat base to sit on. I hadn’t intended on giving my hedgehog feet, as you can’t generally see the feet on hedgehogs, but I didn’t have the heart to throw the cake away, so I cut four feet from it and placed them next to the body.
Decorating the Hedgehog
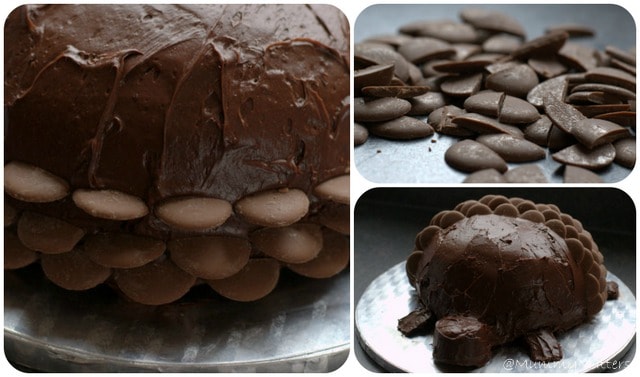
I used chocolate butter icing to cover the dome and upturned cupcake head. I did this by placing large dollops of icing around the cake and then using a flat palette knife to spread the icing all over as neatly as possible.
Giant Chocolate Buttons
Next, I used a sharp knife to cut Giant Chocolate Buttons in half. My cake took one and a half bags of Cadburys Giant Chocolate Buttons and I used Revels to make the eyes and nose of the Hedgehog Birthday Cake.
I began at the back of the Hedgehog body standing the chocolate buttons (flat edge) into the chocolate butter icing in offset rows working forwards until you have left enough space for the face. I used a fork to make lines for the hairs of his face before popping the chocolate counters in place for his eyes and nose. What a cute Hedgehog Birthday Cake!