
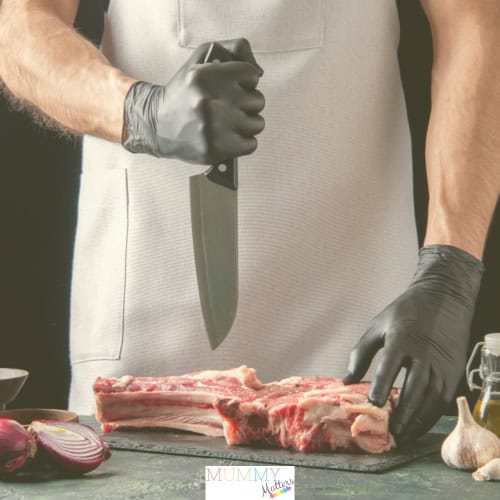
Carving a beautifully cooked joint of meat can feel surprisingly intimidating, particularly when everyone is waiting around the table and you don’t want to spoil the Sunday roast. However, learning how to carve meat properly is less complicated than it might appear.
The right knife, a stable carving surface and an understanding of which direction to slice can make an enormous difference. Good carving doesn’t only improve the presentation of your meal; it can also make meat easier to eat and help you serve neat, even portions.
Whether you are preparing roast beef, chicken, turkey, pork or lamb, this practical guide explains the tools and techniques you need to carve meat safely and confidently.
Editor’s note: I’ll be completely honest: I’m not the cook in our house, and I have never cooked a roast myself. Because I don’t want to pretend to have personal culinary expertise that I don’t possess, this guide has been researched using established carving techniques and recognised UK food-safety guidance. Always follow the cooking and resting instructions supplied with your particular cut of meat.
What Tools Do You Need to Carve Meat?
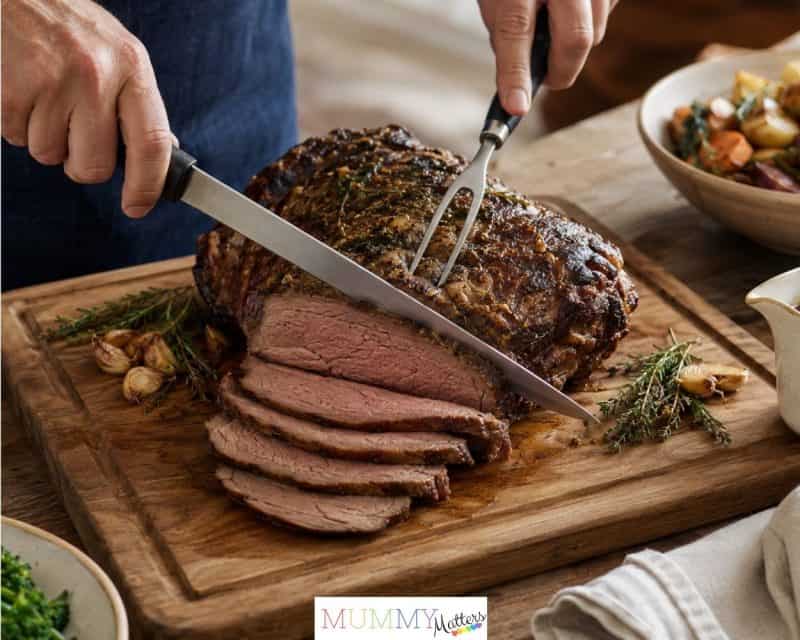
You don’t need a professional collection of kitchen equipment, but using the right tools will make carving easier and safer.
A Sharp Carving Knife
A carving knife usually has a long, relatively narrow blade that allows you to make smooth slices without repeatedly sawing through the meat. A blade measuring approximately 20–25cm is suitable for most household joints and whole birds.
The most important consideration is sharpness. A blunt knife requires more pressure, making it harder to control and more likely to slip. It can also tear the meat rather than producing clean slices.
A Carving Fork or Kitchen Tongs
A carving fork can steady a joint while you slice it, but avoid repeatedly stabbing or pressing down hard on the meat.
If you feel more comfortable using kitchen tongs, these can provide a secure grip without piercing the meat. Whichever option you choose, keep your fingers safely away from the blade.
A Boning Knife
A boning knife is useful when you need to work closely around bones, joints or connective tissue. Flexible blades can follow the shape of bones, while firmer blades offer more control when working with larger cuts.
Understanding the differences between a curved vs straight boning knife can help you choose a knife suited to the kind of meat you prepare most frequently.
A Butcher Knife
Some home cooks also keep a butcher knife available for breaking down larger portions or tackling thick, tough cuts before the more precise carving begins.
A heavy butcher knife is not normally necessary for slicing a cooked roast at the table. It is better suited to preparation work, while a carving knife should be used to create neat serving slices.
A Large, Stable Chopping Board
Choose a chopping board large enough to hold the entire joint without it hanging over the edges. A board with a groove around the outside can catch meat juices and prevent them from running across your worktop.
If the board moves while you are carving, place a damp tea towel or non-slip mat beneath it.
A Knife Sharpener
A honing steel helps to maintain the edge of a knife between uses, while a whetstone or suitable knife sharpener restores a blade that has become blunt.
Follow the manufacturer’s care instructions, as some types of knife require a particular sharpening method.
Choosing the Right Meat
Choosing the right meat is crucial to the success of your carving. Purchase it from a reputable butcher, farm shop or food retailer and check that the cut is suitable for your chosen cooking method. When selecting meat, consider how many people you need to feed, whether you would prefer a bone-in or boneless joint and how you intend to serve it. Boneless joints are generally easier for beginners to carve, while bone-in cuts can create an impressive centrepiece.
Many people now look for transparency in how their food is raised before they make a purchase. Knowing the origin of your beef or chicken helps you understand its texture and fat content, which directly affects how it cooks and carves. When you buy from sources that work directly with local family farms, you get better consistency in every cut. Working with dedicated northern raised farm partners ensures the animals are raised with care and high standards. This level of care results in meat that is tender and easy to slice.
Look for meat with a fresh appearance and check its use-by date and storage instructions. With beef and lamb, fine streaks of intramuscular fat, known as marbling, can contribute to flavour and tenderness as the meat cooks.
Do not leave raw meat sitting at room temperature for a prolonged period. Keep it refrigerated until you are ready to prepare it and follow the storage and cooking instructions provided with the product.
How to Prepare Your Carving Area

Carving becomes considerably easier when everything is ready before the meat comes out of the oven.
Before cooking, or while the cooked meat is resting:
- Sharpen or hone your knife if necessary.
- Choose a chopping board large enough for the joint.
- Place a damp tea towel beneath the board to prevent it from slipping.
- Have a carving fork or kitchen tongs ready.
- Warm the serving platter if you want the meat to remain hot.
- Keep a small jug or bowl nearby to collect the resting and carving juices.
- Make sure children and pets cannot get close to the knife or hot roasting dish.
Move the meat from the hot roasting tin to the carving board before beginning. Trying to carve inside a deep roasting tray restricts the movement of your knife and makes it harder to see the direction of the muscle fibres.
Let Cooked Meat Rest Before Carving
Resting is an important part of preparing meat. If you cut into a joint immediately after cooking, more of its juices are likely to run onto the board rather than remaining within the meat.
Loosely cover the cooked joint with foil and leave it somewhere warm. The appropriate resting time will depend on the cut, recipe and size of the joint:
- Steaks and small cuts may only need around 5–10 minutes.
- A medium-sized joint may benefit from approximately 15–20 minutes.
- A large turkey or substantial roasting joint may need 30–45 minutes.
These are general guidelines rather than universal rules. Always follow the recipe, packaging and food-safety instructions for the particular meat you are cooking.
The meat may continue cooking slightly while it rests, so take this into account when checking its internal temperature. The UK Food Standards Agency provides additional guidance on cooking food safely.
How to Identify the Grain of Meat
The “grain” refers to the direction in which the muscle fibres run. On many cuts, these fibres appear as a series of parallel lines.
Carving across or against the grain shortens the muscle fibres, making each mouthful easier to chew. Cutting in the same direction as the grain leaves longer fibres and can make even well-cooked meat seem tougher.
Before you start carving, look carefully at the top and sides of the joint to identify the direction of the fibres.
On some cuts, the grain changes direction partway through the meat. If this happens, divide the joint into smaller sections and reposition each section before slicing it. This technique is particularly useful when carving beef, lamb and pork.
Basic Meat-Carving Technique
Once the meat has rested, follow these steps:
- Place the joint in the centre of your non-slip chopping board.
- Remove any string, netting or cocktail sticks used during cooking.
- Identify the grain and plan to cut across it.
- Hold the meat securely with kitchen tongs or a carving fork.
- Position the heel of the knife near the meat.
- Use long, controlled strokes through the joint.
- Avoid using a rapid back-and-forth sawing action.
- Keep the slices as even as possible.
- Transfer each slice to a warmed serving platter.
Let the knife do the work. Pressing down too firmly can crush the meat and squeeze out its juices.
How Thick Should You Slice Meat?
The best thickness depends on the cut, texture and way you intend to serve it.
Tender roast beef is often served in relatively thin slices. A slow-cooked brisket may need slightly thicker slices to prevent it from falling apart, while ham and turkey can usually be sliced according to personal preference.
For a family roast, aim for consistent slices rather than worrying about an exact measurement. If family members prefer different thicknesses, carve a mixture and arrange them neatly on the serving platter.
How to Carve Roast Beef
Allow the beef to rest before removing any string. Look for the direction of the grain and position the joint so you can cut across it.
Steady the beef at one end and use long, smooth strokes to create even slices. If the joint has a layer of fat, each slice can include a small amount for flavour, although diners can remove it if they prefer.
For a bone-in rib of beef, it may be easier to remove the bones first. Stand the joint securely and carefully follow the curve of the bones with a sharp knife. Once separated, lay the boneless section flat and slice it across the grain.
How to Carve a Whole Chicken or Turkey
Carving poultry is easier when you remove it in sections rather than trying to cut slices directly from the whole bird.
- Place the bird on the board with the breast facing upwards and the legs pointing towards you.
- Pull one leg gently away from the body.
- Slice through the skin between the leg and breast.
- Bend the leg outwards until you can locate the joint, then cut through it.
- Repeat on the other side.
- Separate each drumstick from its thigh by cutting through the joint.
- Remove the wings in the same way.
- Run your knife down one side of the breastbone, following the ribcage to remove the breast in one piece.
- Repeat on the other side.
- Place each breast flat on the board and cut it crossways into even slices.
Always cut through the natural joints rather than trying to force your knife through solid bones. If the blade meets considerable resistance, stop and reposition it.
How to Carve Roast Pork
Allow roast pork to rest before carving. If the crackling is very crisp, carefully remove it first with a sharp knife and place it to one side. It can then be divided into smaller pieces for serving.
Remove any string and identify the direction of the grain. Slice the pork across the grain using smooth strokes.
If the joint contains a bone, carefully work around it with a boning knife rather than trying to cut through it. Keep the slices relatively even so that everyone receives tender meat and, where appropriate, a portion of crackling.
How to Carve a Leg of Lamb
Position the cooked lamb so that the bone is facing towards you. If necessary, remove a few slices from the rounded side to create a flat, stable base.
Cut slices down towards the bone, working across the grain. Turn the joint when you have removed as much meat as possible from one side and repeat the process. Use a smaller knife to remove any remaining meat from around the bone.
A boneless rolled lamb joint is more straightforward. Remove the string after resting and carve it into even slices across the grain.
Common Meat-Carving Mistakes
Even a beautifully cooked joint can be let down by a few simple carving mistakes.
Using a Blunt Knife
A blunt blade tears meat, requires more pressure and is more difficult to control. Sharpen your knife before the meal rather than waiting until everyone is ready to eat.
Carving Immediately After Cooking
Allowing meat to rest makes the joint easier to handle and can reduce the amount of juice lost when it is sliced.
Slicing With the Grain
Cutting in the same direction as the muscle fibres can make meat appear stringy or chewy. Reposition the joint so you can carve across the grain.
Pressing Down on the Meat
Avoid flattening the joint with a fork or the side of your knife. Hold it just firmly enough to keep it stable.
Using an Unsuitable Surface
Dinner plates, serving platters and small chopping boards may move or restrict your knife. Use a large, stable board and transfer the carved slices to a platter afterwards.
Trying to Cut Through Bones
Unless you are using equipment specifically intended for butchery, find the natural joints and cut through them. Forcing an ordinary carving knife through bone could damage the blade or cause an injury.
How to Present Carved Meat
Once you have finished carving, arrange the slices on a warm serving platter. Slightly overlapping the slices can make the portion look generous without piling the meat into a heap.
Spoon over a small amount of warm cooking juice or gravy to help prevent lean meat from drying out, but avoid pouring it over crisp skin or crackling.
Simple garnishes such as rosemary, thyme, roasted garlic or seasonal vegetables can also help you present your food attractively without making the plate look overly elaborate.
Serve the meat promptly and handle any leftovers safely.
How to Store Leftover Roast Meat
Allow leftover meat to cool and place it in the fridge within two hours. Store it in a clean, covered container, separate from any raw meat.
The Food Standards Agency recommends eating properly refrigerated leftovers within 48 hours or freezing them if that will not be possible. Leftovers should only be reheated once and must be steaming hot throughout before they are served.
Always follow the specific storage instructions for the meat and discard anything that has been left unrefrigerated for too long.
Cleaning Your Carving Equipment
Wash knives, chopping boards, carving forks and tongs thoroughly after use. Keep equipment that has touched raw meat separate from anything used for cooked food unless it has been properly washed in between.
Follow the care instructions supplied with your knife. Many high-quality kitchen knives should be washed by hand and dried immediately rather than placed in a dishwasher.
Store sharp knives in a knife block, protective sheath or magnetic rack so the blades remain protected and cannot cause an injury when someone reaches into a drawer.
Final Tips for Carving Meat Like a Professional
Successful meat carving is largely about preparation and patience. Use a sharp knife, work on a stable surface, let the meat rest and take a moment to identify the grain before making your first cut.
You may not produce perfectly identical slices on your first attempt, and that doesn’t matter. With practice, the process becomes more natural and you will learn how different cuts respond to the knife.
Most importantly, carve safely and confidently. Neatly sliced meat may make the meal look impressive, but flavour, tenderness and sharing good food around the family table matter far more than restaurant-perfect presentation.